Tutorial
Tutorial
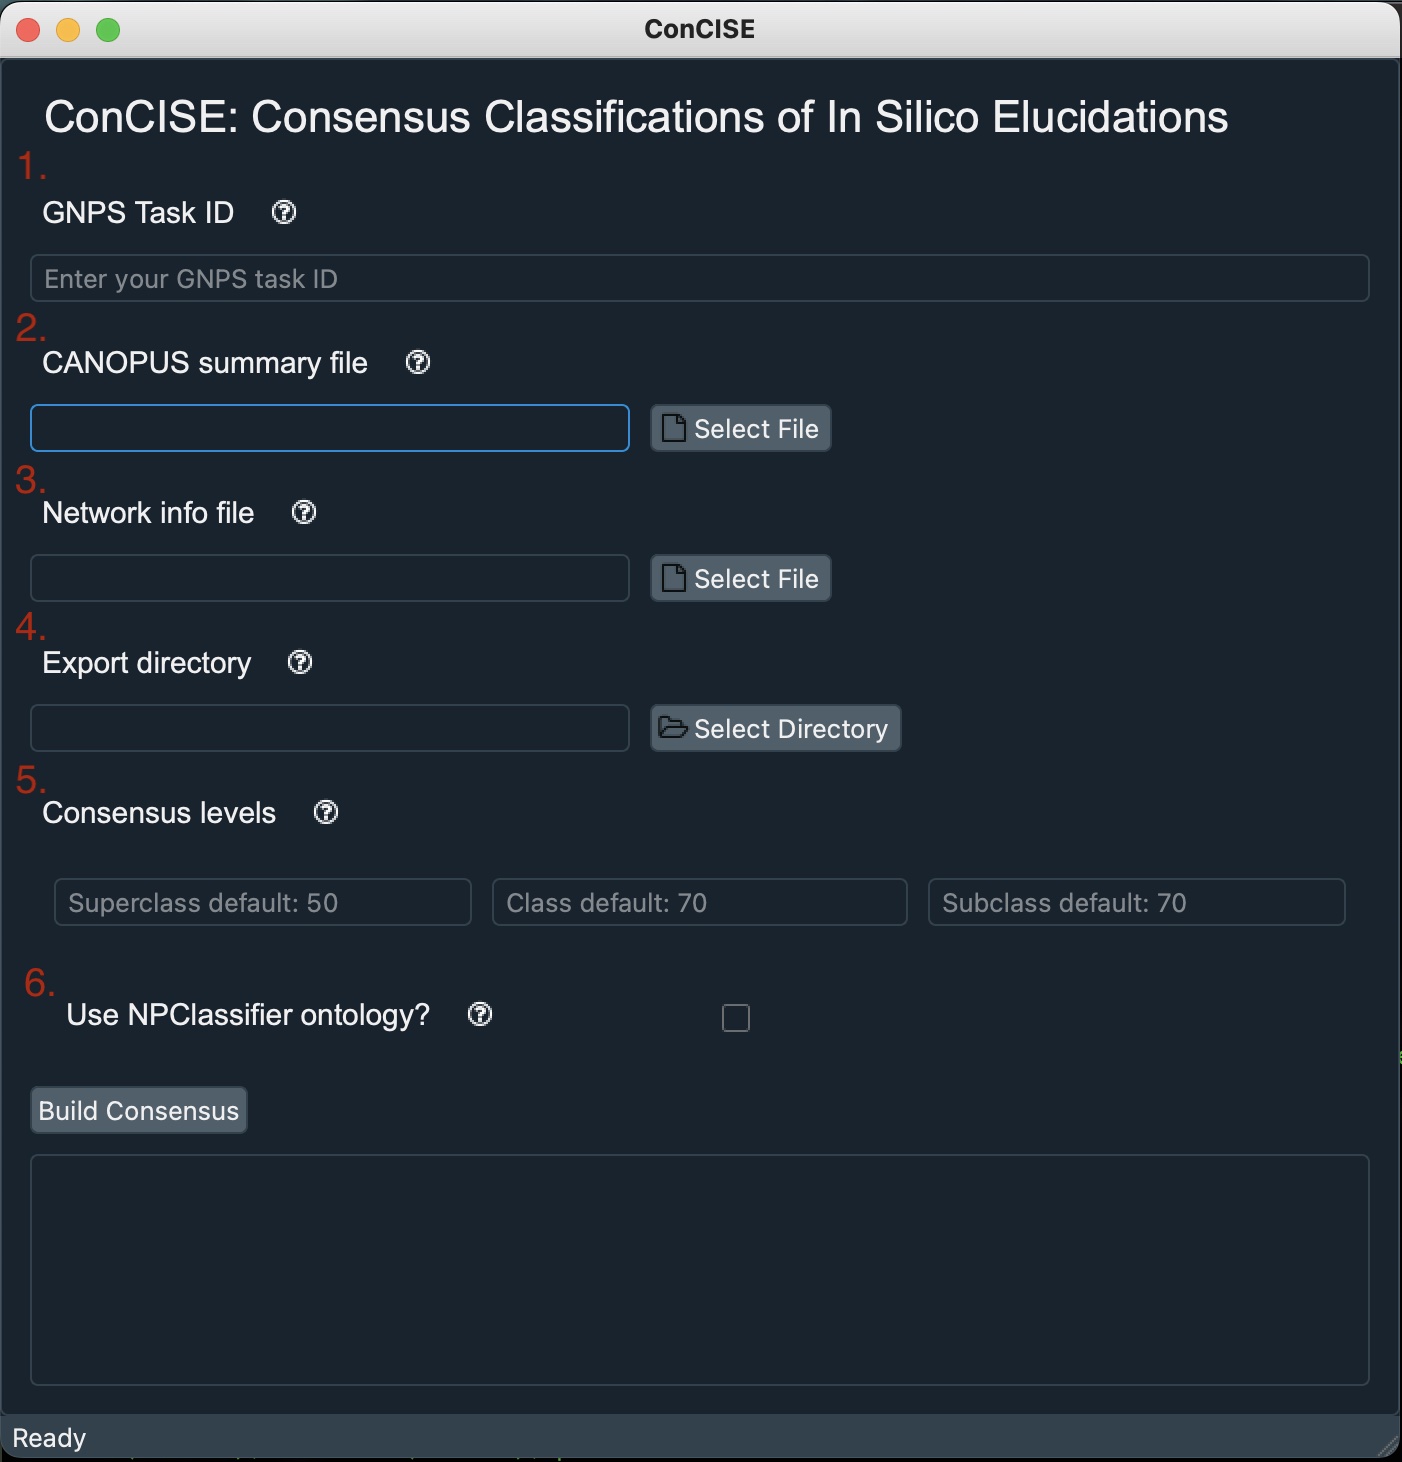
Graphical User Interface
Download
Download the graphical user interface from the most recent release
Insert all information
-
Copy and paste your GNPS job ID into the top field. This can be found in the web address of your GNPS job. (e.g., For this job the task ID is https://gnps.ucsd.edu/ProteoSAFe/status.jsp?task=50cd02513cc0452589479d99ccc9333f “50cd02513cc0452589479d99ccc9333f”)
-
Find your in silico annotation summary file and attach it to the next field. If using CANOPUS this will be the file called “canopusSummary.tsv” after running the SIRIUS workflow. Note: If you would prefer to use a different in silico annotation tool you can supply either a .tsv or .csv file into this field with the columns: “scan”, “superclass”, “class”, and “subclass”. (Scan is the feature number identifier)
-
Find your network node information file which is created by GNPS for molecular networking. This file can be found by downloading the “Cytoscape Data” from your GNPS job. Find the subdirectory called “clusterinfo_summary” and the .tsv file which is in that subdirectory will be your node information. Note: If you would prefer to use a different file which will deliniate which features belong to which subnetworks, make sure your feature number column is called “cluster index” and your subnetwork column is called “componentindex”
-
Select where you would like ConCISE to create your summary file.
-
(Optional) Set thresholds you would like for each of the three ontology levels. ConCISE will automatically default to 50%, 70%, 50%, respectively.
-
(Optional) Check this box, if you would prefer to use NP Classifier ontologies instead of ClassyFire ontologies. NP Classifier ontologies are already supplied by both GNPS and CANOPUS so if you are using either both of these platforms, ConCISE easily be able to use them.